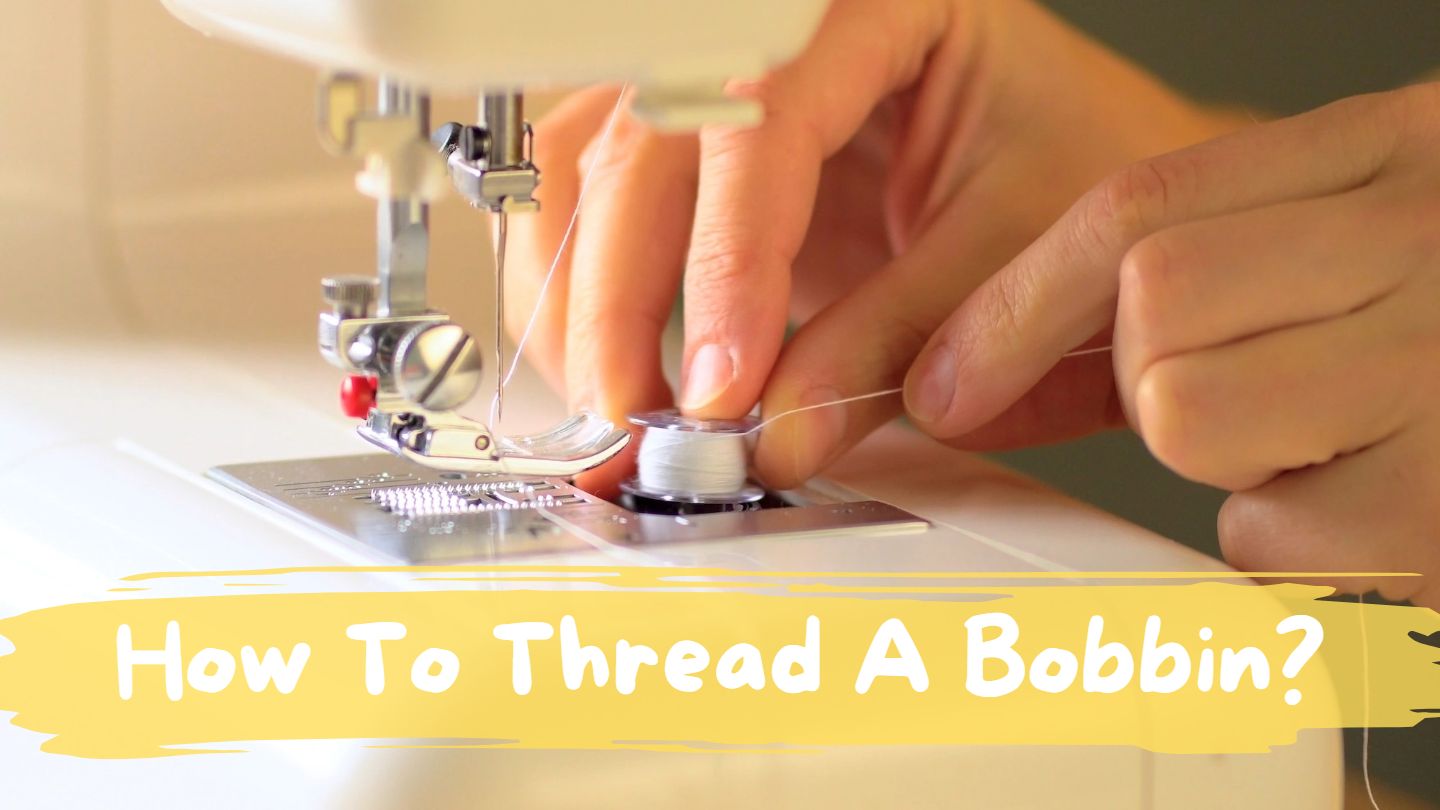
How To Thread A Bobbin?
If you’re looking for a step-by-step guide on how to thread a bobbin, then look no further! Threading a bobbin is easy when you know the right steps, and having a correctly threaded bobbin can help save time and frustration while sewing.
In this blog post, we’ll walk through all the basics of threading your bobbin – from choosing the right type of thread and needle, to figuring out winding tension settings and how to thread a bobbin. By the end of this post, you’ll have everything needed to give yourself (or someone else) that professional finished look on any project. Let’s get started!

What Is Bobbin?
Bobbin is a small spool that holds thread used in sewing, weaving and other crafts. It’s typically used in combination with a needle and thread or yarn to create fabric patterns, clothing or decorative items. Bobbins come in different sizes, colors and materials and are usually made from plastic or metal.
Most modern machines use plastic bobbins as they can be easily manipulated and don’t require much upkeep. Depending on the type of project being worked on, some users may choose to use multiple bobbins at once to increase productivity. The types of threads used with the bobbins will vary depending on the project being undertaken but there are specific tools available for winding bobbins for various purposes.
History Of Bobbin?
The history of bobbin dates back to the 19th century. Before then, threading a needle with a single strand of thread was painstakingly difficult and time consuming. The invention of the bobbin allowed people to take multiple strands of thread and wind them together, making it easier to insert into needles.
In 1854, the first modern bobbin appeared in the form of Isaac Merritt Singer’s rotary shuttle device, which helped revolutionize the sewing machine industry. By the early 1900s bobbins were commonplace in both personal sewing machines and industrial factories across the world, allowing for mass production of garments at higher speeds than ever before. Today, bobbins are still used extensively throughout various industries such as textiles, garment manufacturing, and embroidery to create garments quickly and efficiently. The bobbin continues to be an invaluable tool in the world of fashion for both industrial production and personal use.
In recent years, advances in technology have led to new types of bobbins that are lighter, faster and more efficient than their predecessors. Modern bobbins come in a variety of shapes, sizes and materials allowing for greater customization options when using them for various tasks. With the invention of electric threaders, it has become even easier to thread multiple strands onto a bobbin without having to manually wind each one individually. Bobbins remain essential tools today for anyone who works with textiles or garments on any level.
What Is Threading?
Threading is the process of winding multiple strands of thread onto a bobbin for use in sewing, weaving and other crafts. It also refers to the act of inserting needles with multiple strands of thread into fabric or material. Threading requires careful attention to detail as incorrect placement can lead to tangled threads or loose stitches that may unravel over time.
How Does Bobbin Work?
A bobbin is essentially a small cylinder-shaped spool that holds thread or yarn and is used in combination with a needle to create patterns, clothing and other items. Bobbins are available in various sizes, shapes and materials and are typically made from plastic or metal. To use the bobbin, it must first be filled with the desired threads. This can be done manually by winding the strands onto the bobbin’s spool or through an electric threader for faster results. Once the bobbin has been filled, it can then be inserted into a sewing machine where its motor will rotate it at high speeds allowing for precise stitching of fabric.
How To Thread A Bobbin?
Threading a bobbin is a simple process that requires only basic tools and materials.
What Are Things To Prepare Before Threading A Bobbin?
Before threading a bobbin, the following items should be prepared:
The thread: Make sure that the type of thread being used is compatible with the bobbin and sewing machine.
The bobbin: Make sure to choose a bobbin that has enough capacity for the desired amount of thread.
Needle threader (optional): This tool can be used to help make threading easier, especially when dealing with multiple strands of thread.
Scissors: These can be used to cut the threads and make sure they are even before winding them onto the bobbin.
How To Wind A Bobbin First?
To properly thread a bobbin and wind it up correctly, follow these steps:
- Put the bobbin on the spindle or bobbin holder of your sewing machine. Make sure you have inserted the bobbin in the correct direction. If you are unsure, refer to your sewing machine’s manual for assistance.
- Pull the thread through the bobbin and wrap it around a few times.
- Thread the end of the thread into the hole in the bobbin, making sure that it is secure before continuing.
- Wind the bobbin by turning the handwheel towards you or pressing down on your sewing machine’s foot pedal if it has one. The thread should begin to wind itself around the bobbin as you do this, spiraling away from you.
- When there are no more spools of thread left in the spindle, stop winding and cut off any extra thread with scissors or a seam ripper. Be sure to leave at least 6 inches of tail for easy future removal of your finished bobbin.
Once the bobbin is wound correctly, you can insert it into your sewing machine and continue with your project. Remember to periodically check the tension of the thread to make sure that it’s not too tight or too loose on the bobbin. With a little practice, winding bobbins will become second nature in no time!
How To Thread A Bobbin – Inserting Drop-In Bobbins?
Once you have selected the correct bobbin for your machine, it is time to insert the bobbin into the machine. Drop-in bobbins are inserted from the top of the machine, usually by a removable cover plate. Be sure to check your manual for specifics on how to do this with your make and model of sewing machine.
In general, these steps should be followed:
Step 1: Locate the bobbin case. This is sometimes referred to as a “spool pin” or “bobbin holder”. On some machines, this is located underneath the machine itself; on others, it is accessible through the top of the machine by lifting the needle plate.
Step 2: If your machine has a plastic bobbin case, use your fingers to open and close it when inserting the bobbin. Be sure not to touch any of the metal parts inside as you do so.
Step 3: Place the bobbin in its case with its thread facing up and toward you, ensuring that there are no tangles in the thread and that it winds evenly around the spindle in a counter-clockwise direction. If the thread is wound on in a clockwise direction, it will not work correctly.
Step 4: Once you have securely inserted and threaded the bobbin into its case, close the case and place it back into the machine, making sure that all of the metal parts inside are lining up properly with their corresponding feed dog or take-up lever.
Your bobbin is now ready to be used! Be sure to check your manual for further instructions on how to correctly use your drop-in bobbin in your sewing project. With these steps, you will be able to thread a bobbin like a pro every time!
By following these easy steps, you can master How To Thread A Bobbin in no time! With this knowledge and helpful tips, you will be able to sew with confidence and complete any project with ease. If you ever have any questions or need further assistance, do not hesitate to consult your owner’s manual or reach out to an expert in the field.
How To Thread A Bobbin – Inserting Front Loading Bobbins?
Once you have your bobbin wound, it’s time to insert the bobbin into your sewing machine. Inserting front loading bobbins is quick and easy. Here’s a step-by-step guide on How To Thread A Bobbin:
Step 1: Open the bobbin compartment. You can do this by flipping open a door on the front of your sewing machine or by raising and lowering a plate at the top of your machine.
Step 2: Place the bobbin into the compartment with the thread facing clockwise so that it moves freely in its case. Ensure that you place the bobbin in the correct position for your make and model of sewing machine – check your sewing machine manual for further detail if needed.
Step 3: Pull out about 4-5 inches of thread from beneath the bobbin and draw up to form a loop.
Step 4: Push up on an arm (or similar) found inside your bobbin compartment, where you will see a tension disc if your machine has one.
Step 5: Place the bobbin thread into the hook of this arm and then carefully pull the loop back down, so that it catches on the tension disc, or wraps around another protruding piece of metal.
Step 6: Keep a hold of your thread’s tail and close the compartment door.
Step 7: Pull a few inches from the top spool to create a new loop, insert this in between two specific pieces of metal on either side of your machine (depending on make/model) and then begin winding by inserting your presser foot and hand wheel.
With the steps guide on how to thread a bobbin – inserting front-loading bobbins, you can have your bobbin inserted and threaded in no time. Don’t worry if it takes a few attempts – once you become more familiar with the process, threading a bobbin will be a breeze! If you find yourself getting stuck at any stage of the process, refer to your sewing machine manual for specific instructions for your make and model of machine.
Happy Sewing!
How To Thread The Bottom Of Your Singer Tradition?
If you have a Singer Tradition sewing machine, you may find that threading the bobbin can be a bit tricky. Fortunately, we’ve put together this step-by-step guide to help make sure it’s done correctly and ensure your projects turn out perfect every time.
- Start by getting everything ready. This includes winding the thread around the bobbin and inserting it into the bobbin case. Make sure to leave enough room for threading, so don’t wrap too tightly or too loosely.
- Next, open up the top of your machine and locate the upper tension dial on one side of the needle plate assembly. Release this dial and the upper thread tension should now be relaxed.
- Now, locate the lower tension dial on the other side of the needle plate assembly and release it to relax the bobbin’s tension as well.
- Find the path for threading in your Singer Tradition machine and make sure any lint or dust has been cleared away so there are no obstructions.
- Insert your threaded bobbin into the holder and ensure that it is placed in securely according to your specific machine’s instructions.
- Pull out a small amount of thread from your bobbin before re-tightening both tension dials located on either side of the needle plate assembly—the upper thread tension first, then the lower thread tension.
- Hold the thread from your bobbin as you turn the hand wheel towards you. This should bring the needle down into position, and allow you to pull some of the thread through from the bobbin.
- Finally, cut off any excess thread and re-thread your top tension if needed. You’re now ready to start sewing!
Threading a Singer Tradition machine is easy once you get used to it, but following these steps should help ensure that each project turns out perfect every time! Good luck and enjoy your projects!
How To Choose Your Bobbin?
When choosing a bobbin for your machine, there are several factors that you should take into consideration. Size, material, and thread count are the three most important elements to consider.
Size: Bobbins come in various sizes, so it’s important to ensure that the bobbin you select corresponds with the size of your particular machine model. This will ensure a proper fit and help prevent any tension issues that can arise from an incorrect bobbin size.
Material: The type of material used for your bobbin is also something to think about when selecting one. Plastic bobbins tend to be lighter weight but are vulnerable to melting if exposed to high temperatures, while metal bobbins may provide more stability and durability.
Thread Count: The thread count of your bobbin is also important to consider. A higher thread count means you’ll be able to fit more threads in the bobbin, making it last longer and giving you better stitch quality.
Once you’ve chosen a bobbin that’s compatible with your machine and meets all the criteria outlined above, you can then begin learning How To Thread A Bobbin so that you’re ready to begin sewing. Understanding how to properly install and tension the bobbin will help ensure the best results for all your projects!
What Are Some Tips To Thread A Bobbin?
Threading a bobbin is not difficult, but there are some tips that can help you get the best results. Here are some of the most important ones to keep in mind:
– Always use the correct size and material for your machine so that it fits securely and keeps tension levels consistent.
– Wind thread tightly around your bobbin (but not too tight!) and leave enough room for threading.
– Make sure both upper and lower tensions are relaxed before inserting your threaded bobbin into the holder.
– Pull out a small amount of thread from your bobbin before re-tightening both tension dials located on either side of the needle plate assembly—the upper thread tension first, then the lower thread tension.
– Hold the thread from your bobbin as you turn the hand wheel towards you to bring the needle down.
– Re-thread your top tension after cutting off any excess thread and you’re ready to start sewing!
These tips should help make sure that you get perfect stitches every time with How To Thread A Bobbin! With practice and patience, you’ll be able to easily complete this task in no time. Happy sewing!
What Are Some Problems People Face When Threading A Bobbin?
When it comes to How To Thread A Bobbin, there are certain problems that people may face during the process.
- Threading the bobbin incorrectly. Incorrectly threading the bobbin can cause tension issues, skipped stitches and inconsistent stitch formation.
- Not using the correct size or type of bobbin for your machine. Different machines require different types of bobbins; make sure you are using the right one for your machine.
- If a filament of thread is still attached to the bobbin when inserted into the machine, it will not pick up properly and may result in snags or tangles in your fabric as well as an incorrect stitch count in a patterned piece of fabric.
- Not selecting the proper stitch length on your machine before beginning to sew with a new bobbin can affect how well the stitches pull up on the fabric.
- Incorrect thread tension can cause problems when sewing with a new bobbin. Too much or too little tension can affect the quality of your stitches and the overall appearance of your project.
By following these simple tips, you can avoid any potential problems when threading a bobbin. Taking the time to make sure your machine is properly set up and that you are using the right size or type of bobbin will help to ensure successful sewing projects with every use!
How To Select The Right Bobbin For A Sewing Machine?
When choosing the right bobbin for your sewing machine, there are a few important factors to consider. First, you want to make sure that the bobbin size matches up with the type of thread and needle being used. In general, you’ll want to select a bobbin that is slightly larger than the needle diameter so that it can accommodate thicker threads. Additionally, if your needle has a groove along its length then you should ensure that the bobbin is designed for this kind of use.
Another thing to think about when selecting a bobbin is how easy it will be to thread. Make sure that there are no sharp edges or points on the inside of the bobbin casing; these could catch onto or damage delicate threads. You should also look for bobbins with a larger opening at the top that make it easier to thread your needle.
Once you’ve selected an appropriate bobbin, you will need to know how to thread it correctly. Generally, bobbin threading is done by wrapping the thread around the spindle or post on the side of the bobbin and then pulling it up through the hole in its center. Be sure to pull the thread tight when winding it onto your bobbin so that there won’t be any slack when sewing. Additionally, if your machine has a tension adjustment then make sure it is set correctly before using your newly-threaded bobbin.
Picking out a quality bobbin and threading it properly are two of the most important steps in ensuring that your sewing machine works optimally. With a bit of patience and care, you can make sure that you select the right bobbin for your sewing project every time.
The Types of Bobbins:
The bobbins of a sewing machine are key components that help the machine stitch fabric together. Knowing the difference between drop-in bobbins and front-load bobbins can make all the difference when selecting a sewing machine.
Drop-In Bobbin (Or Top Load Bobbin): A drop-in bobbin is the most widely used type of bobbin. It is inserted into a slot on top of the sewing machine, and requires you to pull out the thread after winding in order to secure it. When properly threaded, a drop-in bobbin will be able to take up both upper and lower threads without any manual adjustment required.
Front-Load Bobbin: Front load bobbins are inserted into a different part of the sewing machine than drop-in bobbins. They generally require you to turn a handwheel or presser foot lever in order for them to move from their spot at the front of the machine back up through your fabric. This type of bobbin is typically easier to thread than a drop-in, and requires less attention when changing spools. However, it can be more difficult to control the tension with front-load bobbins, so they’re best suited for lighter weight fabrics. Additionally, if your sewing machine has an automatic needle threader, it might not work with this type of bobbin.
Overall, both types of bobbins serve the same purpose: to provide a supply of thread that your sewing machine uses in order to stitch fabric together. They are both easy to install and use and will help you create beautiful projects! It really just comes down to personal preference when deciding which one works best for you. Which will you choose?
FAQs About How To Thread A Bobbin
How Do You Fix Broken Thread When You Are Sewing?
If you find that the thread has become broken while sewing, there are a few things you can do. First, check to make sure your bobbin is threaded properly and that the upper thread is passing through both the tension discs and the take-up lever. If everything looks okay, then check to see if there are any snags or knots in the thread itself. If you find any, cut them out and start stitching again.
What Do You Do If The Bobbin Thread Is Not Catching?
If the bobbin thread is not catching, it usually means that either the upper thread or bobbin thread was not threaded correctly or something has become tangled in your sewing machine. If this is the case, try unthreading and rethreading both threads. Additionally, check for any snags or knots in the thread itself and cut them out before you attempt to sew again.
What Do You Do If My Machine Stops Filling The Bobbin Before It Is Full?
If your machine stops filling the bobbin before it is full, there are a few possible causes. First, check that your bobbin isn’t over-filled as this can cause tension issues when sewing. If it isn’t over-filled, then make sure that the take-up lever and tension discs are set correctly. Finally, if everything else looks correct then check to make sure that your upper thread is passing through the tension discs and take-up lever.
Why Does The Thread Keep Getting Caught In The Notch On The Spool?
If you find that your thread is getting caught in the notch on the spool, it could be a sign that something isn’t threaded correctly. First, check to make sure that both the upper thread and bobbin thread are threaded properly. Additionally, make sure that there aren’t any snags or knots in either of the threads. Once everything is good to go, try stitching again.
How Do You Keep The Thread From Looping When You Are Winding The Bobbin?
If you find that your thread is looping when winding a bobbin, check to make sure that the tension discs and take-up lever are adjusted correctly. Additionally, make sure that your thread is pulled tightly when winding the bobbin as this will help keep it from looping.
How Much Thread Does A Bobbin Hold?
The amount of thread a bobbin can hold will vary depending on the type and size of bobbin you are using. Generally speaking, a standard drop-in or front-load bobbin can hold up to 40m (130ft) of thread.
How Many Bobbins Do You Really Need?
If you’re just starting out with sewing, we recommend having at least two or three bobbins handy in order to work through multiple projects at a time. As you become more experienced, you may want to invest in additional bobbins as needed to ensure that you always have enough thread on hand for whatever projects come your way.
Conclusion On How To Thread A Bobbin
Overall, learning how to thread a bobbin can seem intimidating at first but with this tutorial, you should be able to manage the process with confidence. It is important to remember the order of each step and take your time. Remember, practice makes perfect! Once you have threaded your bobbin, feel confident in knowing that you can keep creating beautiful results for years to come.
We hope this guide has helped you understand the general basics of how to thread a bobbin. Whether you select a drop-in or front-load bobbin, make sure to follow the instructions from your sewing machine’s manual in order to ensure that everything is threaded correctly. With just a bit of practice, you’ll be on your way to creating beautiful projects! Happy Sewing!
References:
How to Thread a Sewing Machine (with Pictures) – wikiHow
Checklist of Common Sewing Machine Problems